> ## Documentation Index
> Fetch the complete documentation index at: https://docs.zaidkayed.com/llms.txt
> Use this file to discover all available pages before exploring further.
# Quickstart
> Get started using the app and run your first scan in minutes.
## Main Page
This is the main page of the app, it's where you do the filtering and create snapshots - we'll come to that in a minute -,
we will start by explaining each set of actions and how it works.
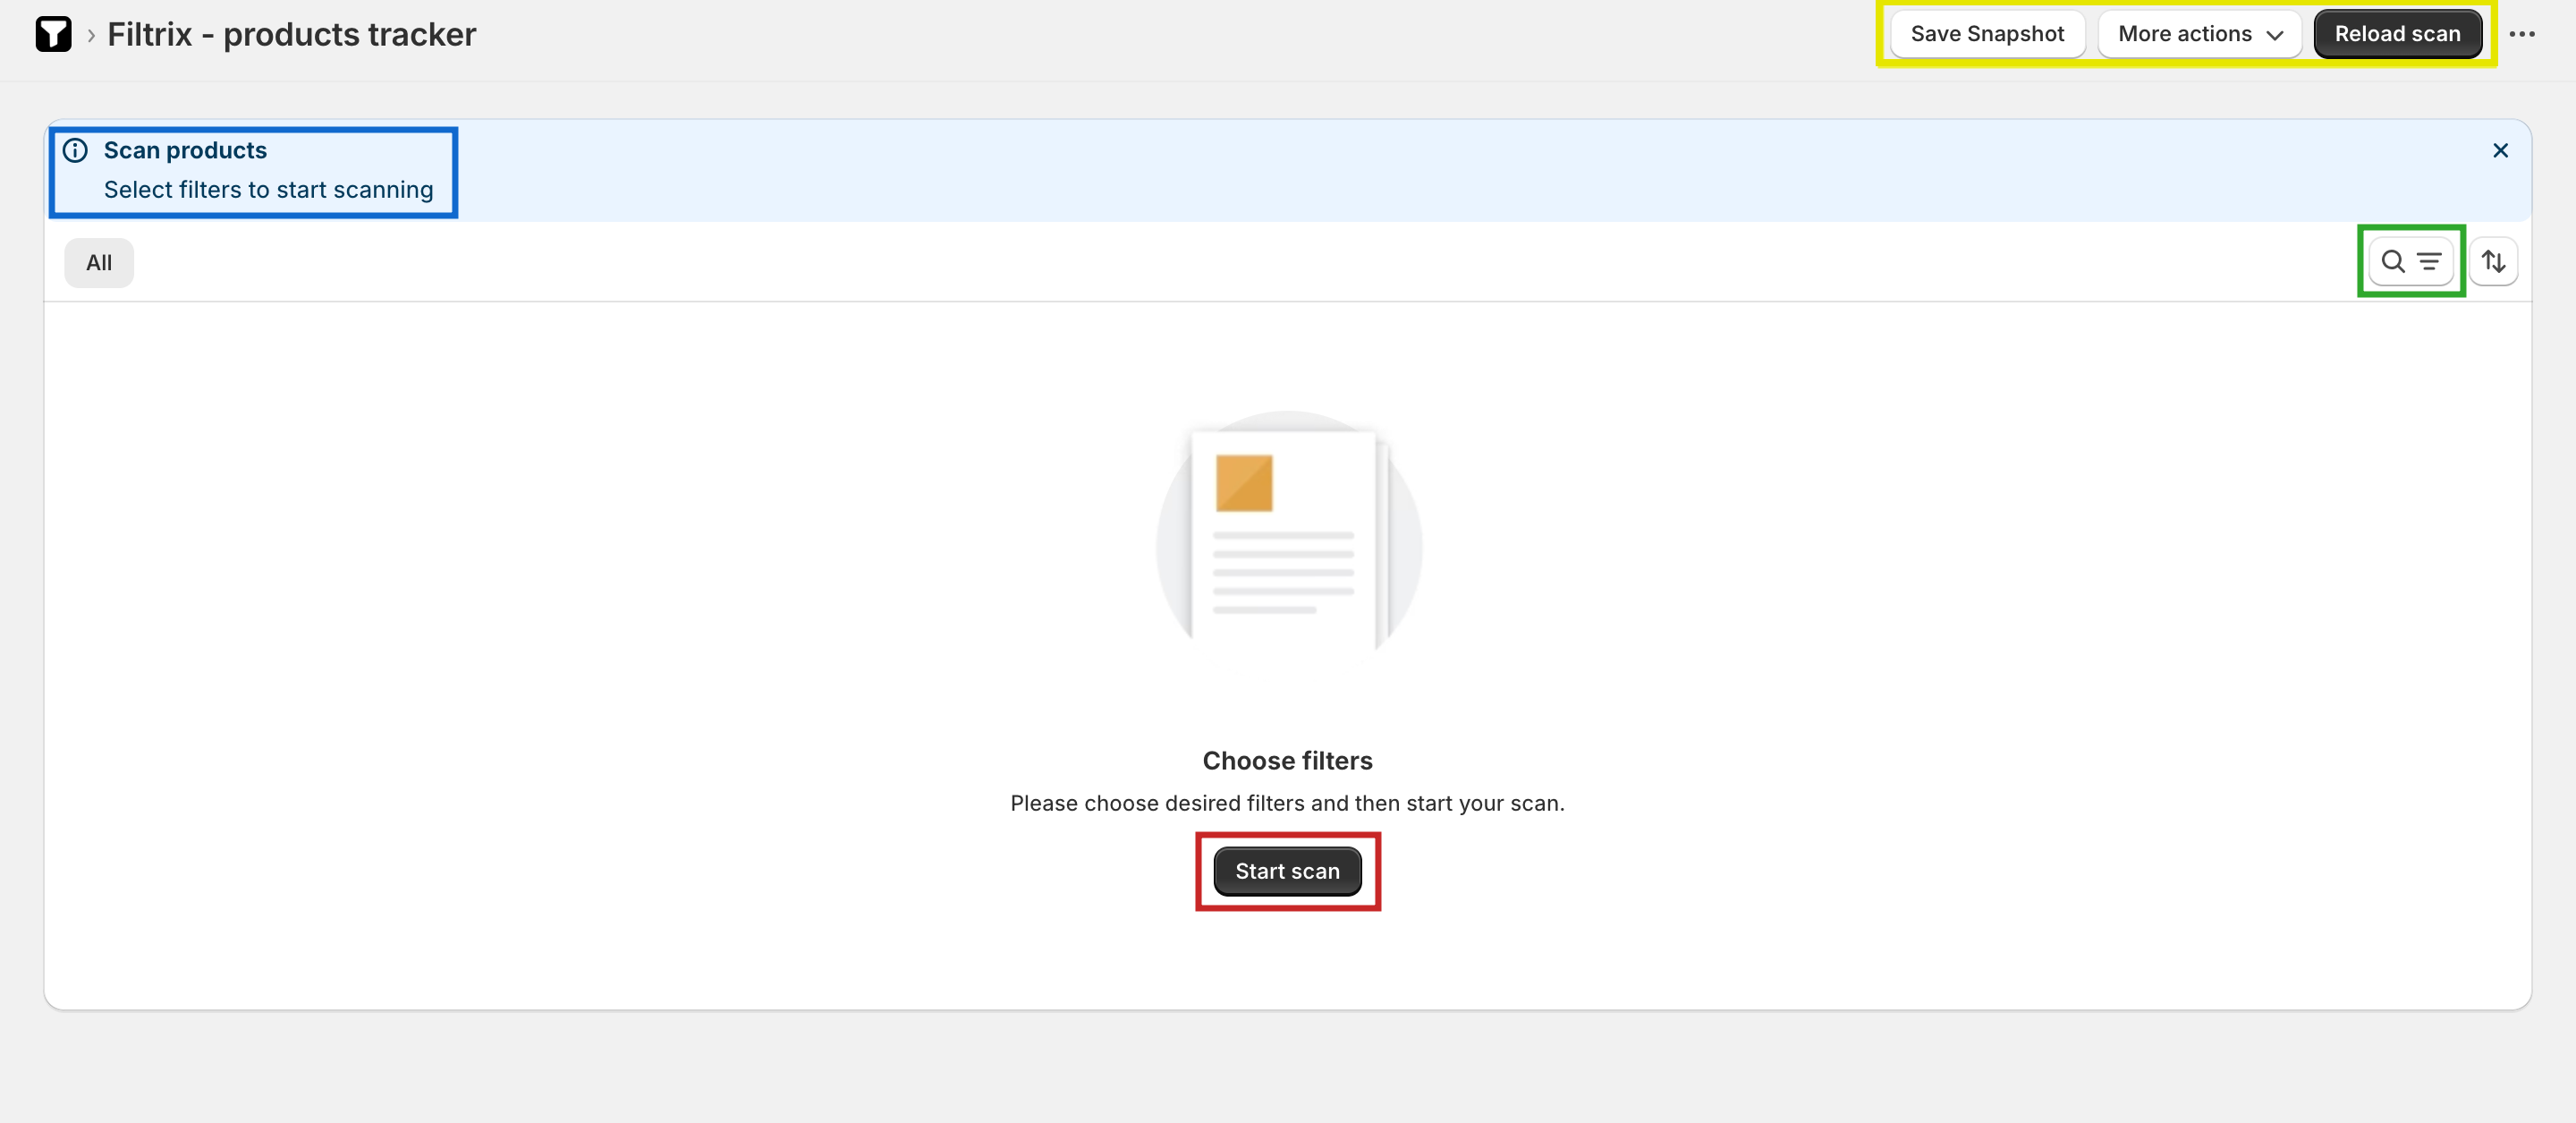 | Color | Description |
| ------------------------------------------------------------------------------------------------------------------------------------------ | -------------------------------------------------------------------------------- |
| Green | Opens the filters |
| Red | Start/reload scan (while scanning) |
| Yellow | Actions to create a snapshot, pause/resume/reload scan, and continue a full scan |
| Blue | Info / errors of the current scan process |
## First Scan
There are many filters that you could use simultaneously, but for the
purpose of illustration we will focus on two.
We only want to focus on active products
This filter finds products with a variant that doesn't have an image.
The scanning process starts immediately.
The reason why the app scans products in batches is due to the Shopify API limit, this prevents the app from querying all products.
A workaround exists, though it needs more setup which is why it's a paid feature.
## Scan Result
Products with variants won't have a price displayed
| Color | Description |
| ------------------------------------------------------------------------------------------------------------------------------------------ | -------------------------------------------------------------------------------- |
| Green | Opens the filters |
| Red | Start/reload scan (while scanning) |
| Yellow | Actions to create a snapshot, pause/resume/reload scan, and continue a full scan |
| Blue | Info / errors of the current scan process |
## First Scan
There are many filters that you could use simultaneously, but for the
purpose of illustration we will focus on two.
We only want to focus on active products
This filter finds products with a variant that doesn't have an image.
The scanning process starts immediately.
The reason why the app scans products in batches is due to the Shopify API limit, this prevents the app from querying all products.
A workaround exists, though it needs more setup which is why it's a paid feature.
## Scan Result
Products with variants won't have a price displayed
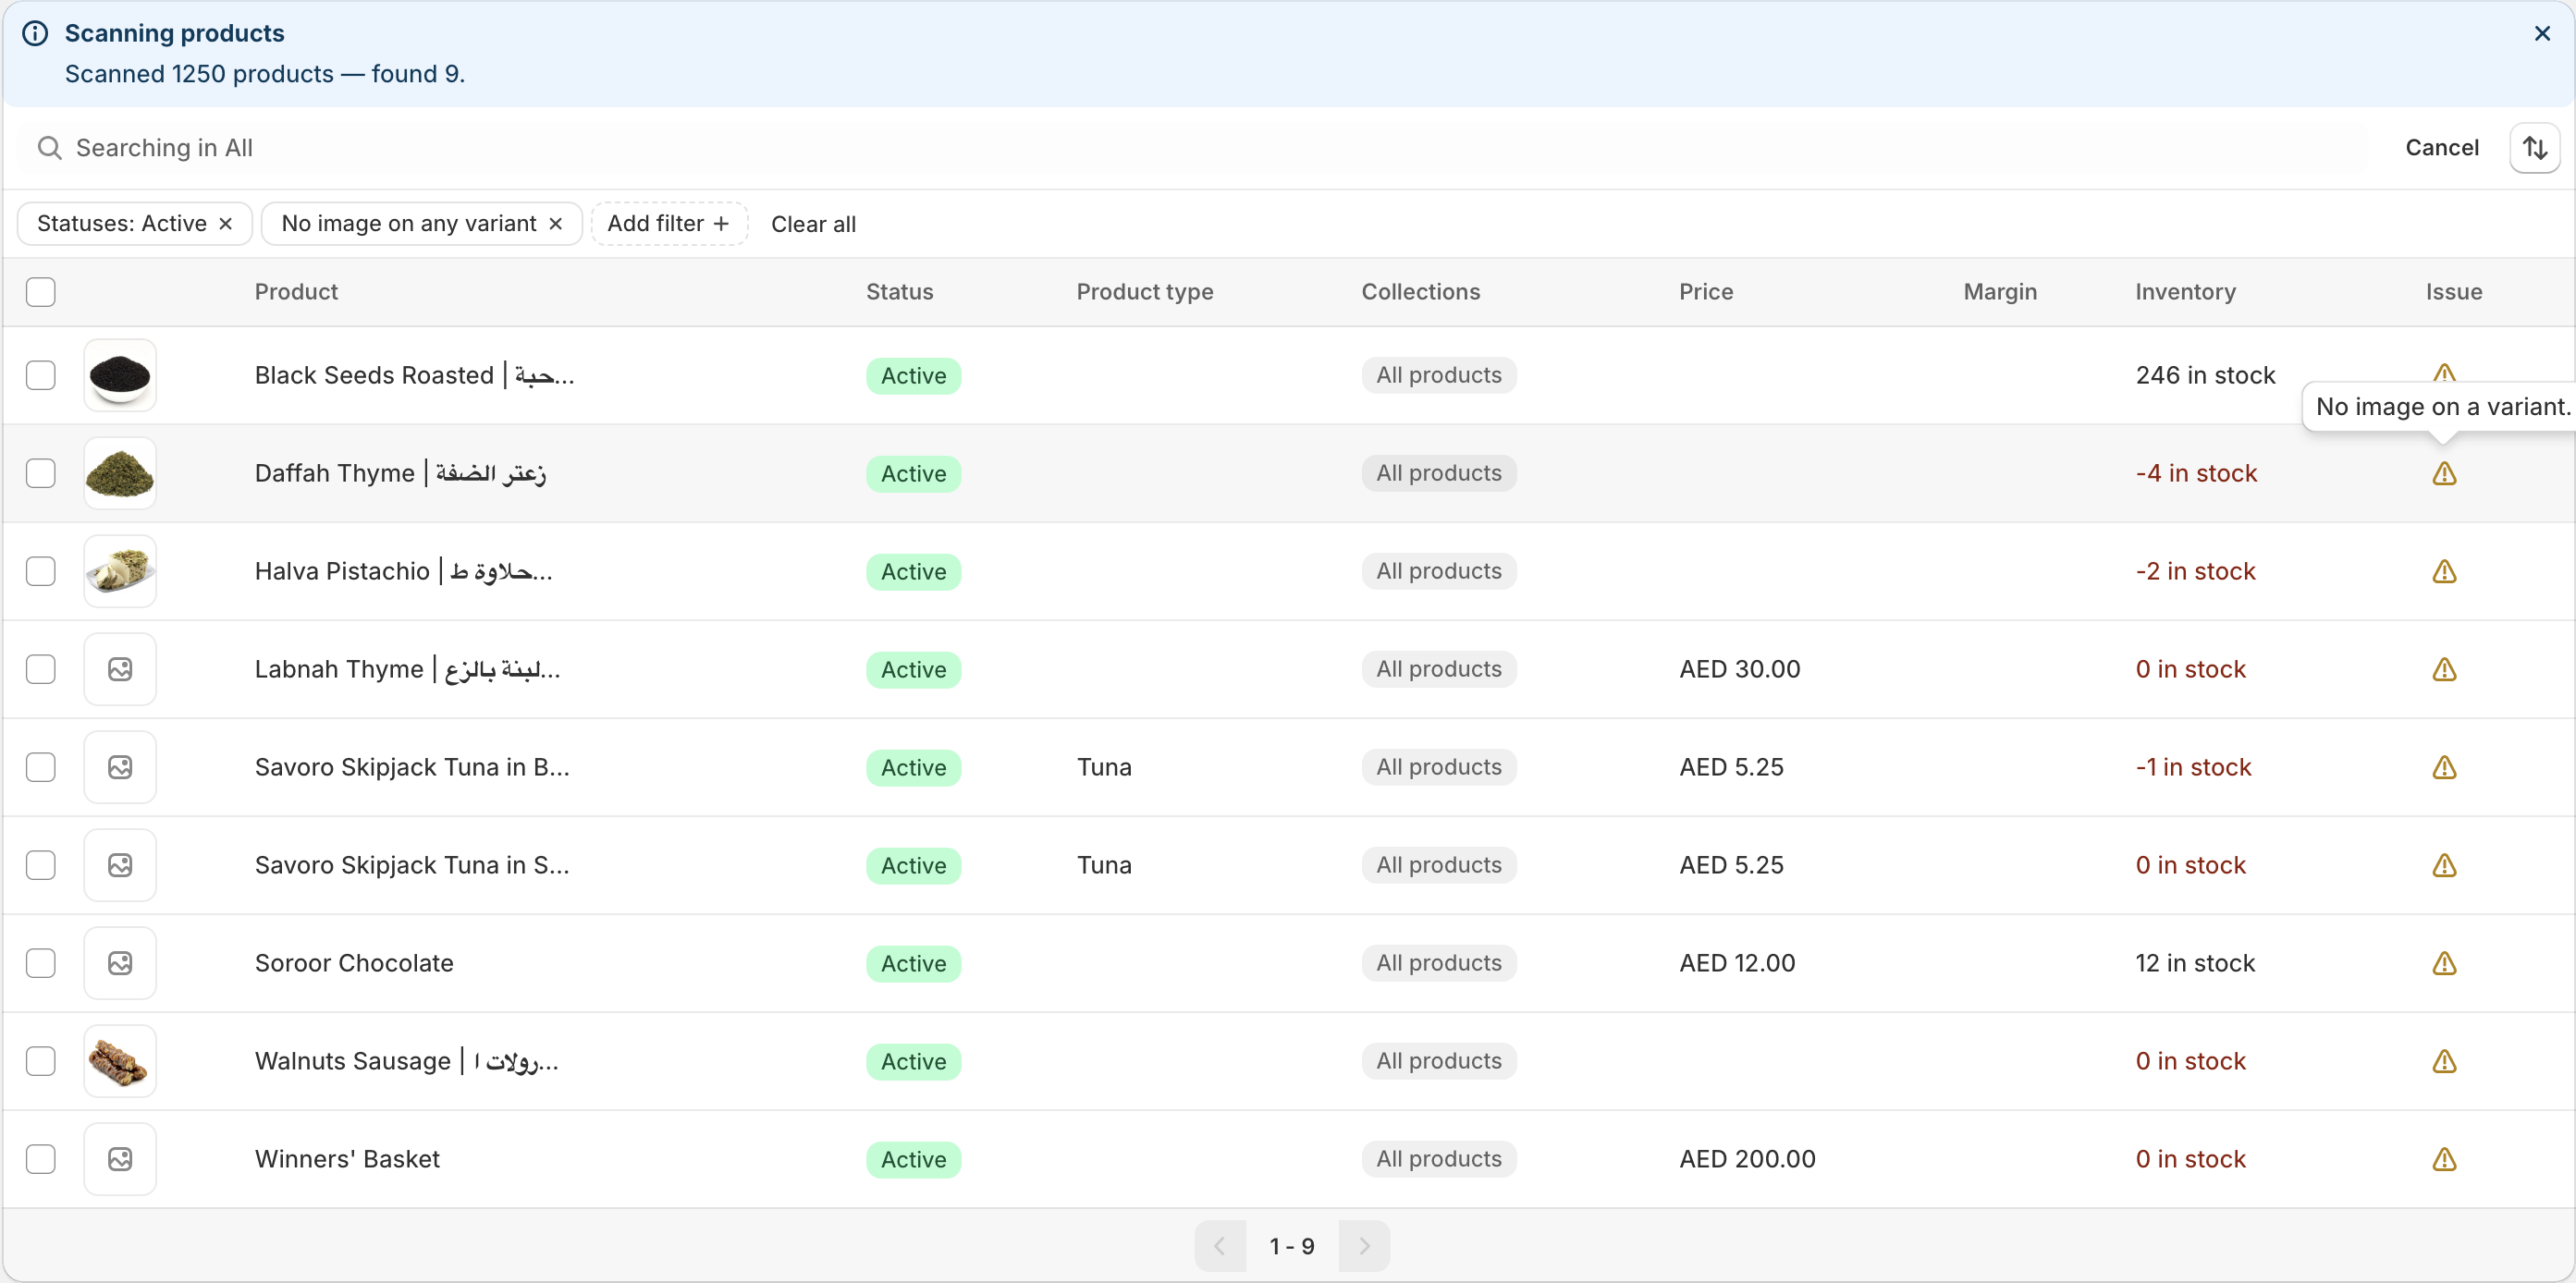 We found products with missing images
Learn more about the images filter [here](/filter/images).
The scan here is paused, you could either pause your scan from the `More actions` in top right corner or it would stop once it fills the current page, you could override this limit by enabling `Allow full scan` in the same panel and it will keep going.
## Create a Snapshot
Now it's best to create a snapshot and save these products for later review.
To create a snapshot:
We found products with missing images
Learn more about the images filter [here](/filter/images).
The scan here is paused, you could either pause your scan from the `More actions` in top right corner or it would stop once it fills the current page, you could override this limit by enabling `Allow full scan` in the same panel and it will keep going.
## Create a Snapshot
Now it's best to create a snapshot and save these products for later review.
To create a snapshot:

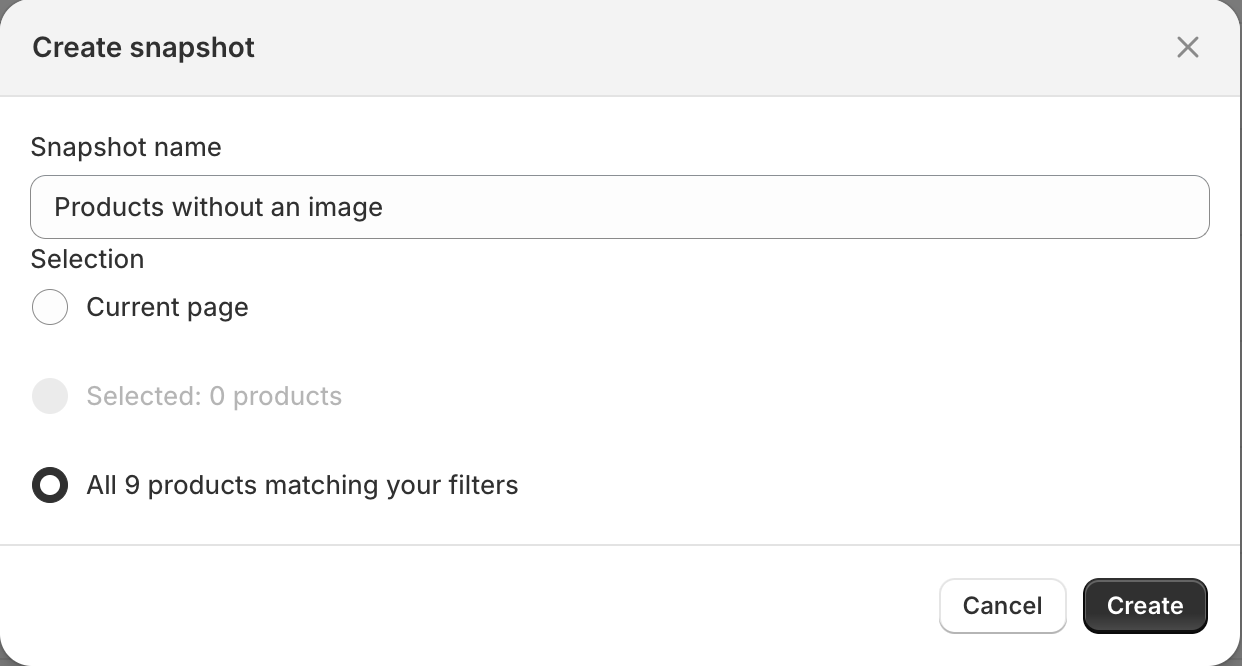 Your products are now saved inside an individual snapshot
Go to the `Snapshots` page and you can view all your saved snapshots.
You can easily share the link to your snapshot to anyone and they could view the product list and update it accordingly.
Your products are now saved inside an individual snapshot
Go to the `Snapshots` page and you can view all your saved snapshots.
You can easily share the link to your snapshot to anyone and they could view the product list and update it accordingly.